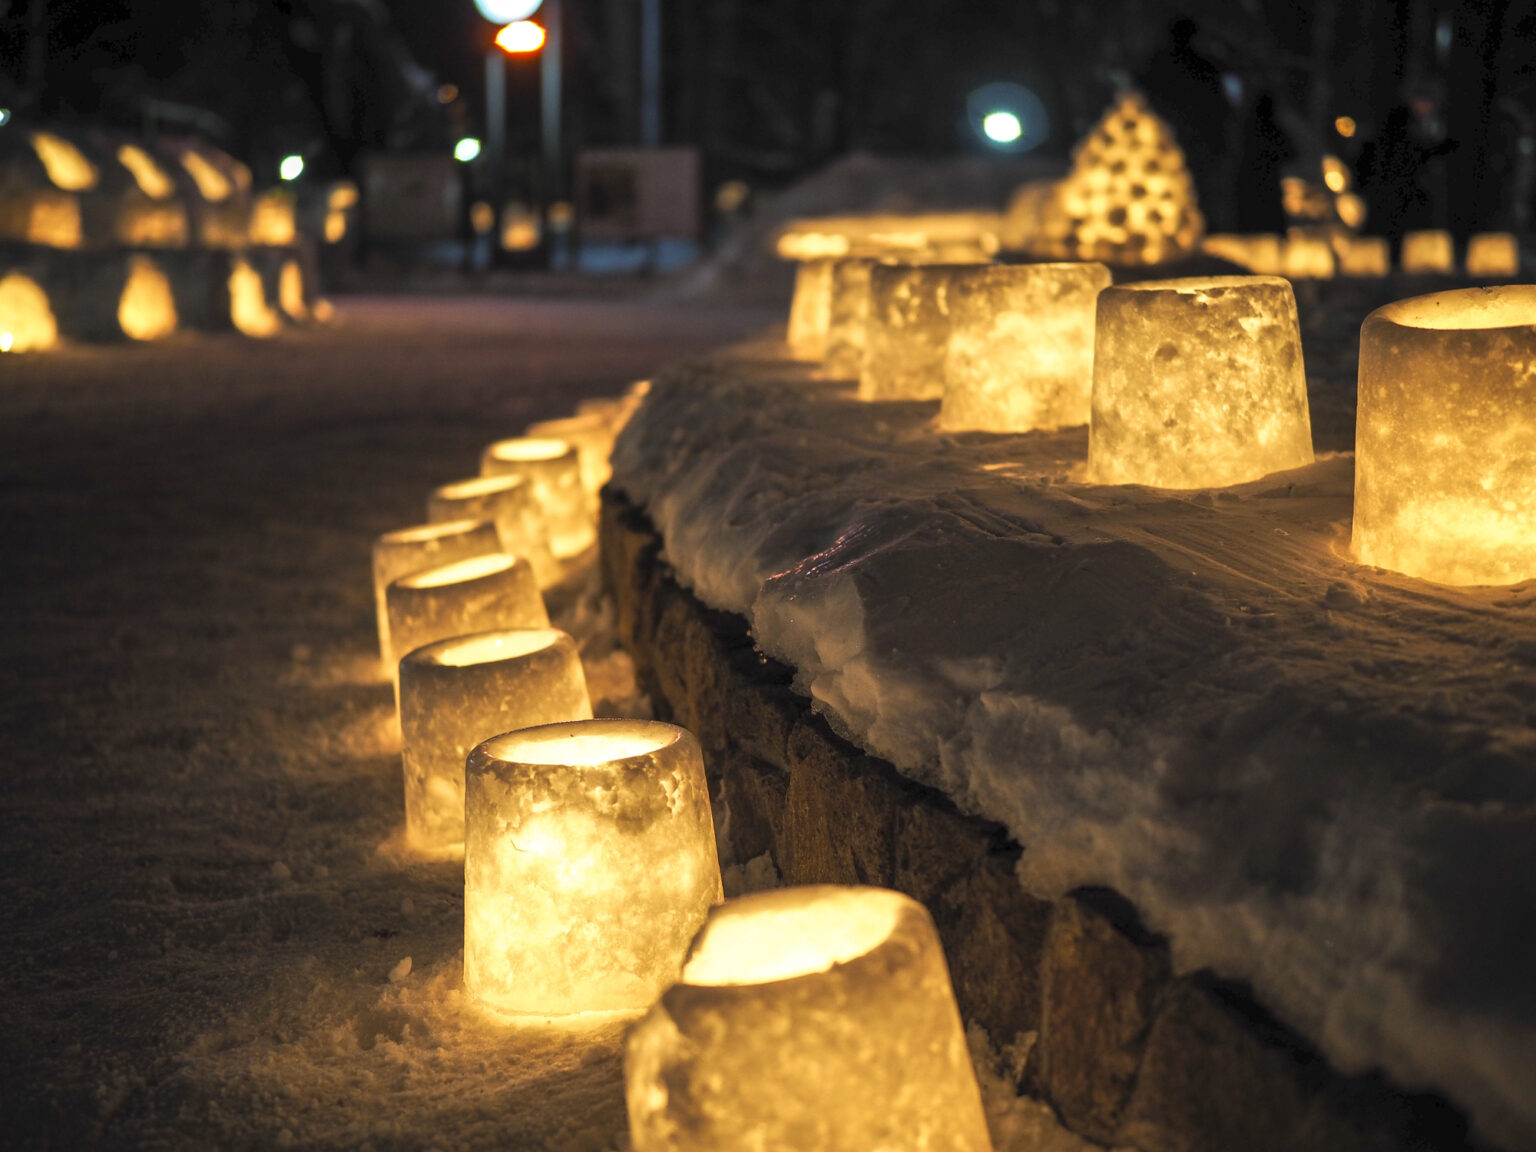
Turn freezing temperatures into glowing magic: These simple DIY ice lanterns transform any winter night into something unforgettable.
If you’ve ever walked a snowy path or skating trail lined with glowing luminaries, you know how quietly spectacular they can be. The good news—these wintry showpieces are surprisingly easy to make at home. With a couple of containers, water and whatever natural elements you can gather from the garden, you can create lanterns made of ice that shine long after the sun sets.
How to Make DIY Ice Lanterns
Materials for DIY Ice Lanterns
- Large plastic container, bowl or bucket
- Smaller plastic cup, yogurt container or jar
- Water
- Natural elements such as evergreen sprigs, leaves, berries or citrus slices
- Stones or small weights to hold the inner container in place
- Tea lights or LED candles
Instructions for DIY Ice Lanterns
- Choose your containers.
Select a larger container for the outside shape and a smaller one that will sit inside it to create the hollow centre. The space between them will become the lantern walls. - Position the inner cup first.
Place the smaller container inside the larger one, centring it as best you can. Fill the inner container with stones or a little water to weigh it down so it doesn’t float once water is added. - Add decorative elements.
Tuck leaves, berries, evergreen clippings or citrus slices into the space between the two containers. Arrange them along the sides so they’ll be visible once frozen. They may shift slightly when you pour in the water, which is perfectly normal. - Pour in water.
Carefully pour water into the space between the containers until it reaches just below the rim. Adjust decorations gently if needed to keep them visible near the outer edge. - Freeze completely.
Place the setup outside in below-zero temperatures or in a freezer. Depending on size and weather, freezing can take 12 to 24 hours. The ice should be solid all the way through. - Unmould your lantern.
To release, briefly run lukewarm water over the outside of the large container. Remove the inner cup first, then ease the lantern out of the mould. - Add light and display.
Place a tea light inside the hollow centre. Make a number of them and line a walkway, porch steps or a backyard skating rink for a warm winter glow that feels magical against the snow.
Tip: If the weather is hovering around freezing, let the lanterns sit outside overnight to firm up. The colder the temperature, the longer your DIY ice lanterns will shine.