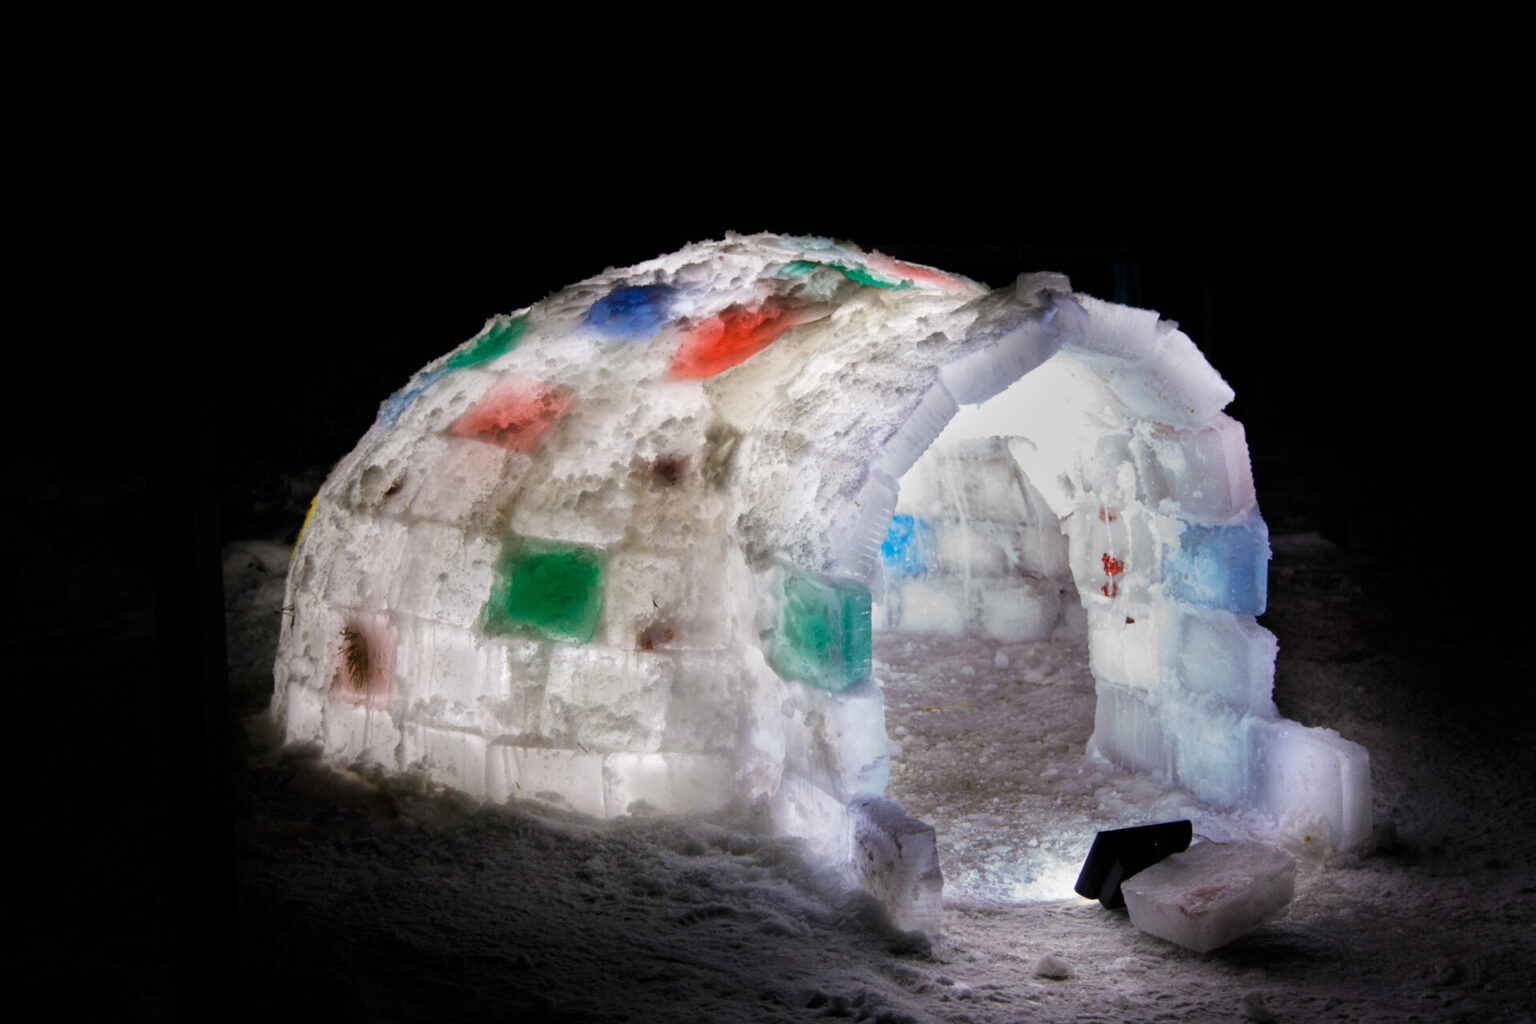
All you need is fresh snow, food colouring and a little commitment to build a backyard rainbow igloo the whole neighbourhood will be talking about.
Looking for the ultimate snow-day flex? (Or really, are you just so sure that you can't possibly watch another animated movie?) We've got the answer: a backyard rainbow igloo.. They look elaborate, but they’re really just a series of frozen snow blocks stacked with a bit of patience and a lot of colour. If you’ve got a few days of steady cold and kids who don’t mind wet gloves, you can turn an ordinary snowfall into something abslolutely magical.
What You'll Need for a Rainbow Igloo
- Fresh, packable snow
- Plastic containers for moulding blocks (go for containers around the same size for easy building: food storage containers, loaf pans, 2L juice containers)
- Food colouring in bold shades
- Water
- Large bowls or pitchers for mixing coloured water
- A spoon or small cup for pouring
- Waterproof gloves for everyone
- A flat area of yard or driveway for building
- Optional: battery-powered lantern for inside the finished igloo
Directions for Making a Rainbow Igloo
Step 1: Make your snow blocks. After a good snowfall, pack snow firmly into your containers, pressing down so the blocks hold their shape. You’re aiming for solid and compact rather than perfect. If the snow is too powdery, let it sit for a bit or lightly mist it with water so it packs better.
Step 2: Add the colour. Mix water with several drops of food colouring in separate bowls. Don’t be shy — saturated colour shows up best once frozen. Pour or drizzle the coloured water into the packed snow inside the moulds so it soaks through. Some families prefer to mix the colour directly into the snow before packing it, but either method works. (You can also make true blocks of ice, if you prefer; you just pour coloured water into the containers instead of using snow as a base.)
Step 3: Let everything freeze solid. Leave the filled moulds outside until completely frozen. In really cold temperatures, this can happen fairly quickly. Once solid, turn the containers upside down and gently tap to release your coloured blocks.
Step 4: Build the base. Choose a flat area and arrange your first row of blocks in a circle, leaving a gap for a doorway. Use a mixture of snow and warm water between blocks as “glue,” packing it into gaps to help stabilize the structure.
Step 5: Stack and angle inward. Add additional rows, angling each layer slightly toward the centre to create a dome shape. Smaller blocks are helpful as you get higher and the curve becomes steeper. Don’t worry about gaps—they’ll let light filter through.
Step 6: Finish the top. As the opening narrows, carefully place the final blocks to close the dome, again using packed snow to secure them. It doesn’t need to be seamless; the charm is in the mosaic effect.
Step 7: Let it glow. The magic really happens at sunset, when light shines through the coloured ice. For extra impact in the evening, place a battery-powered lantern inside to get a stained-glass effect.
IMPORTANT NOTE: It may take a couple of days to build depending on the weather and how many blocks you're able to freeze at once, but the result is worth it—a temporary backyard art installation that feels far more complicated than it actually is and will be the talk of the neighbourhood.